
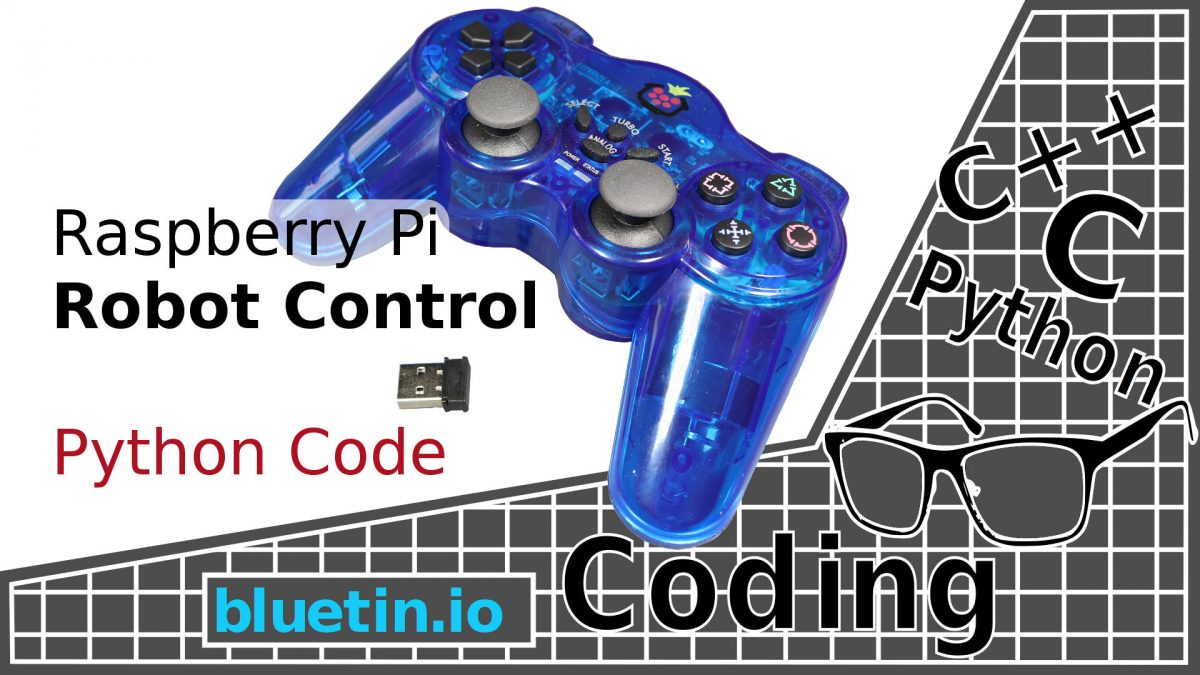
To get my Raspberry Pi robot moving, I need a wireless robot control system. So, in this article, I connect a game controller to the Raspberry Pi and use Python programming to manage the input commands. Included, is a controller button-ID map and Python base-code to translate controller inputs.
For this exercise, I will be using the Raspberry Pi controller, see the review here. However, this exercise should work with any controller that is supported by the Inputs Python module. It should be noted that game controllers are only suitable for short-range wireless robot control.
Game Controller
At first, it might seem a bit overkill to use a game controller for controlling a robot. This is due to the number of buttons available. However, some game controllers, like the one I use here, is plug and play. Which, will help reduce overall setup and simplify Python code. Over time, it is likely that more buttons will be used as more control features are added to the robot.
Programming
The goal is to create a parcel of code that just deals with the robot control system. So, the control system will be responsible for collecting inputs from the controller. Then format and filter those inputs to execute specific functions.
Specific functions can include functions to:
- Drive and steer robot control algorithm.
- Control LEDs for various lighting systems such as Headlights, turning indicators, beacons and decorative displays.
- Add a control to various robot attachments such as a Nerf dart gun and camera pan and tilt.
- Switching various systems on and off.
- Add autonomous control elements to wireless robot control.
Robot Control Software
The robot control Python code below provides a good starting point in developing software to control a robot. If you are using a Raspberry Pi controller, such as the one featured in this article, you can run the code now on a Raspberry Pi. The code, in its current form, does not yet drive any Raspberry Pi GPIO pins or DC motors. However, that will change over the next few articles.
Python Code
#!/usr/bin/env python3
"""
robot_control_inputs.py
www.bluetin.io
"""

__author__ = "Mark Heywood"
__version__ = "0.1.0"
__license__ = "MIT"

from inputs import get_gamepad

# Dictionary of game controller buttons we want to include.
controller_input = {'ABS_X': 0, 'ABS_RZ': 0, 'BTN_SOUTH': 0, 'BTN_WEST': 0}

#-----------------------------------------------------------

def gamepad_update():
    # Code execution stops at the following line until gamepad event occurs.
    events = get_gamepad()
    return_code = 'No Match'
    for event in events:
        event_test = controller_input.get(event.code, 'No Match')
        if event_test != 'No Match':
            controller_input[event.code] = event.state
            return_code = event.code
        else:
            return_code = 'No Match'

    return return_code

#-----------------------------------------------------------

def drive_control():
    # Function to drive robot motors
    print('Drive and Speed --> {} || Steering Angle --> {}' .format(controller_input['ABS_RZ'], controller_input['ABS_X']) )

#-----------------------------------------------------------

def fire_nerf_dart():
    # Function to fire Nerf dart gun on the robot
    print('Fire Nerf Dart --> {}' .format(controller_input['BTN_SOUTH']) )

#-----------------------------------------------------------

def led_beacon():
    # Function to switch led beacon on/off on the robot
    print('Switch LED Beacon --> {}' .format(controller_input['BTN_WEST']) )

#-----------------------------------------------------------

def main():
    """ Main entry point of the app """
    while 1:
        # Get next controller Input
        control_code = gamepad_update()

        # Gamepad button filter
        if control_code == 'ABS_X' or control_code == 'ABS_RZ':
            # Drive and steering
            drive_control()
        elif control_code == 'BTN_SOUTH':
            # Fire Nerf dart button
            fire_nerf_dart()
        elif control_code == 'BTN_WEST':
            # Switch the LED Beacon
            led_beacon()

#-----------------------------------------------------------

if __name__ == "__main__":
    """ This is executed when run from the command line """
    main()
The above code can easily be modified to catch all the game controller button events. Furthermore, the code, with the featured game controller, will also work on a Raspberry Pi Desktop virtual machine. Thus the article to set up a Raspbian virtual machine can be found here.
Robot Control Python Code Guide
I am writing the robot control code to support Python version 3 and above. So the suitability of the code for other Python versions will not be tested here. However, most Raspberry Pi OS versions will likely have Python3 already installed.
If you are working within an isolated Python environment, you will need to install the inputs module there. There is a guide to isolated Python environment setup here.
For the above Python code to run, we need to install the inputs Python module. Therefore, install inputs module, by opening a Terminal, and entering the following command:
sudo pip3 install inputs
Ideally, you want the above Python code in a suitable directory. So change to a directory to run and edit the code from. Then, either copy the above code to a new file or download the code from my Github.
Before downloading the code from Github, change directory to where the code should be put. Then run the following command at the terminal prompt:
wget https://raw.githubusercontent.com/MarkAHeywood/raspberrypi/master/robot/robot_control_inputs.py
Then to run the Python code, enter the following at the command prompt:
python3 robot_control_inputs.py
However, make sure the controller wireless dongle is plugged into the USB port before running the code. Moreover, the code may not show any output initially, at least until you press a controller button.
Robot Control Code Breakdown
Here I break down the code to explain some parts of it. When reading the code, also note that:
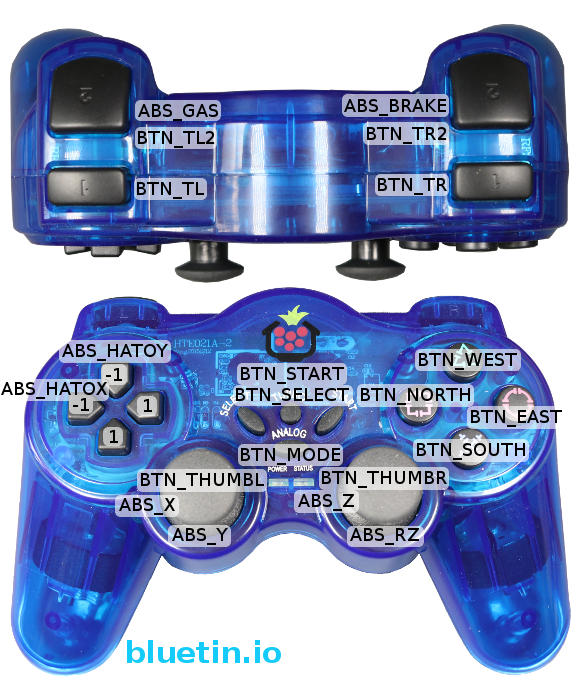
- Dictionary key names and event.code values are the button labels in the controller button map image displayed above.
controller_input = {'ABS_X': 0, 'ABS_RZ': 0, 'BTN_SOUTH': 0, 'BTN_WEST': 0}
So, the above code snippet is using the dictionary data type to register controller buttons I want to use. Using the dictionary data type allows me to associate dictionary keys to controller event codes. Thus I can avoid using loops in the code for value matching.
Robot Control Event Function
def gamepad_update():
    # Code execution stops at the following line until gamepad event occurs.
    events = get_gamepad()
    return_code = 'No Match'
    for event in events:
        event_test = controller_input.get(event.code, 'No Match')
        if event_test != 'No Match':
            controller_input[event.code] = event.state
            return_code = event.code
        else:
            return_code = 'No Match'

    return return_code
The function above deals with collecting button presses from the game controller. So the code reads all the events that are triggered while using the controller. Then for each event-code read, we check if the event-code matches a key name in the dictionary. And if there is an event-code match, the dictionary key value will update with the event-state value.
However, if the event-code do not match the dictionary key, no dictionary key value update is made. Event-state values will either be:
- The value of 0 or 1 for button inputs. Where value 1 means the button is active.
- For the Hat pad, 0, 1 and -1, will output for different states.
- 0 to 255 for thumbsticks input, with resting position values of 127 and 128.
- 0 to 255 for Gas and Brake trigger buttons.
Robot Control Action Functions
def drive_control():
    # Function to drive robot motors
    print('Drive and Speed --> {} || Steering Angle --> {}' .format(controller_input['ABS_RZ'], controller_input['ABS_X']) )

#-----------------------------------------------------------

def fire_nerf_dart():
    # Function to fire Nerf dart gun on the robot
    print('Fire Nerf Dart --> {}' .format(controller_input['BTN_SOUTH']) )

#-----------------------------------------------------------

def led_beacon():
    # Function to switch led beacon on/off on the robot
    print('Switch LED Beacon --> {}' .format(controller_input['BTN_WEST']) )
The above functions are basically to test that the controller buttons events have filtered through the program correctly. furthermore, you can create new functions with code that interacts with the Raspberry Pi hardware. For instance, press a controller button to turn on an LED.
The print statements in the above functions are there just to provide feedback to the terminal screen. But you can remove or change these.
Robot Control Main Function
def main():
    """ Main entry point of the app """
    while 1:
        # Get next controller Input
        control_code = gamepad_update()

        # Gamepad button filter
        if control_code == 'ABS_X' or control_code == 'ABS_RZ':
            # Drive and steering
            drive_control()
        elif control_code == 'BTN_SOUTH':
            # Fire Nerf dart button
            fire_nerf_dart()
        elif control_code == 'BTN_WEST':
            # Switch the LED Beacon
            led_beacon()
Apart from importing the gamepad library from the inputs module, no game controller set up is needed. So we just call the gamepad update function on every program cycle. On a successful controller event match, the matching dictionary key is updated. Then the dictionary key name is returned when the function call has ended.
Therefore, in the main function, the returned key name is then filtered through if statements. However, any controller buttons added to the dictionary should also be added to the if statement tests. Successful if statement tests can then lead to a function call to perform some kind of action.
Code Cons
events = get_gamepad()
The above call from the gamepad update function is an execution blocking function. This means the robot control program will stop at this line of code while it waits for another event. Therefore, the robot control program, in the current form, cannot continue another process if there are no gamepad input events.
However, the blocking function is not a deal breaker, as there are easy enough ways to get around it. But for general switching on and off functions and PWM adjustments, the above code is fine.
What next
The next step, to develop this code further, is to add DC motor control. So the next article we will look at functions to make a robot drive in all directions.
Related Articles
Multithreading Raspberry Pi Game Controller in Python – Link.
Raspberry Pi Controller For Robot Control Review – Link.

Raspberry Pi Raspbian Virtual Machine On Your Desktop – Link.
Buying Featured Items
The purchase price is going to vary greatly depending on how quickly you want the items. Therefore shop around checking out Amazon, Ebay, Adafruit and local electronic stores.
The Pi Hut
- Raspberry Pi Compatible Wireless Gamepad / Controller – Link
UK Searches:
UK Amazon:
US Searches:
US Amazon:
On Closing
I hope you find this article useful – Robot Control with Raspberry Pi and Python, please like and share.
4 thoughts on “Robot Control with Raspberry Pi and Python”
Comments are closed.