
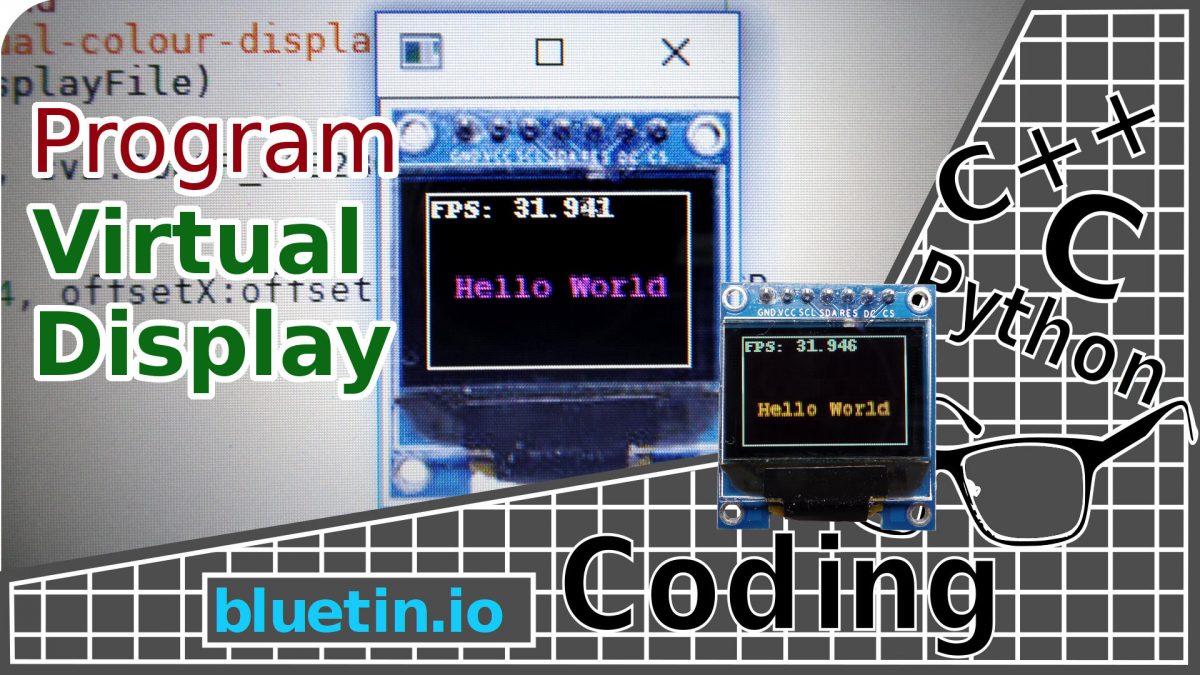
Using PIL and OpenCV, this guide will show you how to simulate a small full-colour display attached to the Raspberry Pi on a PC. The virtual display will then allow you to create animated or interactive content initially on the PC. Then, with a little code modification, port the Python code to the Raspberry Pi. I also include example test code with this guide.
Many of the small LCD or OLED displays that you can attach to the Raspberry Pi are supported with Python libraries from Adafruit and Luma-OLED. These libraries support the Python Image Library (PIL) to create content for the small displays. We can run the PIL package on various platforms including the Raspberry Pi and the PC. However, to efficiently debug the display content, we need access to a physical display.
So, this article shows you how to create a virtual display that will effectively operate like a real display attached to the Raspberry Pi. This virtual display will then allow testing of interactive or animated content on the PC before porting to the Pi. You can configure the virtual display to match different display sizes and colour depth.
Using a virtual LCD/OLED display will allow you to develop and debug display content without your PC or Laptop tethered to the Raspberry Pi. Moreover, you will have instant access to desktop-class applications to help create content within the same environment. Additionally, while using the power of the PC or Laptop, you can use your favourite text editor to debug and run Python code more efficiently to test display content. Also, using a virtual display makes the project more portable, allowing you to try new ideas more conveniently and on the move.
Things you can do on this virtual display:
- Create and debug animations and game scenes.
- Develop and test menu driven systems.
- Configure the virtual display to match physical display characteristics.
Virtual Display with PIL and OpenCV
SYSTEM SETUP
If you have followed the previous two articles in this display series, then you will only need to install OpenCV and NumPy. However, you’ll only need to install these packages on the platform where you want to create the virtual display. So, in most cases, executing the following commands will install NumPy and OpenCV on your platform:
The commands below are for Python version 3. So, adjust the commands to fit the Python version you are using.
pip3 install numpy
pip3 install opencv-python
You can find more details about this OpenCV package here:
- Unofficial OpenCV packages for Python – Link.
However, if you are new to this series, you will also need to follow the previous two articles to complete the physical and virtual display setups. The previous two articles are as follows:
OLED Display Library Setup for the Raspberry Pi featuring SSD1331 – Link.
The above guide shows how to setup the OLED display drivers on the Raspberry Pi. This driver is PIL Python package compatible and will work with this guide. However, Adafruit display libraries are also PIL compatible and may also work with this guide.
Create OLED or LCD Display Content with Pillow – Graphics and Fonts – Link.
The above guide covers setting up fonts and libraries that should be on both the Raspberry Pi and the PC. Furthermore, the guide includes example code to test both platforms. You will also find details on how to port code for display content between two different platforms.
Porting PIL Between OpenCV and Display Driver
We create an image using the PIL Python package, then pass that image to the display driver. So, to create animation, for instance, we need to send a stream of images to the display driver. The display driver will then update the physical display with each image update.
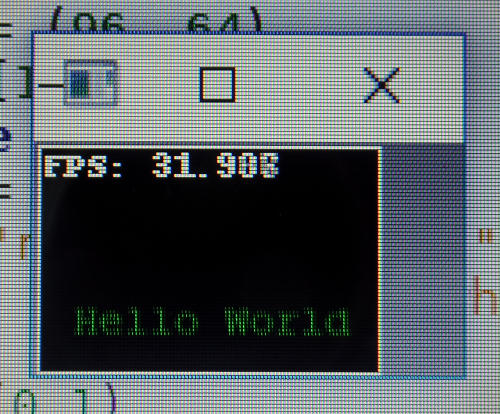
To simulate a physical display, we need a solution to display a stream of images within the same frame; like watching a video. And the solution I’ve found is to use OpenCV interactive GUI methods. These GUI methods will allow us to stream images to a static frame or window similar to a physical display. Also, the GUI methods will accept keyboard input that will help with creating interactive displays.
To drive a Physical display, you might be using code similar to the following:
We first import the driver libraries and then configure the serial port:
# Import Luma.OLED libraries
from luma.core.interface.serial import spi
from luma.oled.device import ssd1331
# Configure the serial port
serial = spi(device=0, port=0)
device = ssd1331(serial)
Then, to send the PIL image to the physical display, we use the following code:
# Output to OLED display
device.display(image)
So, not much Python code at all to drive a Physical display. Therefore, you can easily comment out this code when swapping to the virtual display code.
To drive a virtual display using OpenCV:
We import two libraries for NumPy and OpenCV:
import cv2
import numpy as np
Then, we send the PIL image to the virtual display methods:
npImage = np.asarray(image)
frameBGR = cv2.cvtColor(npImage, cv2.COLOR_RGB2BGR)
cv2.imshow('Test', frameBGR)
The first line we have to convert the PIL image to a NumPy array for the benefit of OpenCV. Then, we convert the image from RGB to BGR colour model. And finally, we show the resulting image on the computer desktop.
However, additional lines of code are added to provide a method to close the image window by a keypress. But this code can be extended to catch further keypresses for creating interactive components of the display. In this case, the code allows the ESC key to close the program.
k = cv2.waitKey(1) & 0xFF
if k == 27:
    break
Before the program closes, we add a final line of code to close the OpenCV window:
cv2.destroyAllWindows()
If you check the example code below, you will see how the above code fits around the PIL image routines. The PIL image routines are not affected when porting between a physical and a virtual display. Porting between the two display types is a case of commenting and uncommenting a few lines of code.
Animated PIL Image Example Python Code
Here, we have two code examples that do the same thing. However, one code example has the virtual display lines of code uncommented. And the other code example has the physical display driver lines of code uncommented. So one example code runs on the Raspberry Pi and the other runs on the PC.
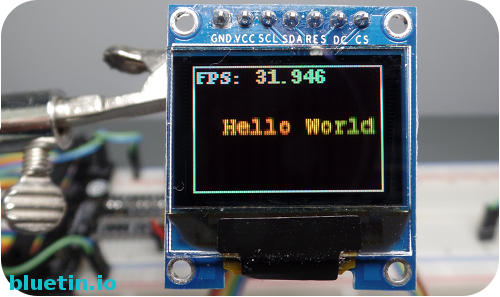
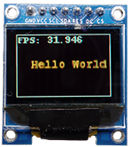
The example code is a text animation that changes colour and will look identical between the physical display and the virtual display. However, the scale of the virtual display will depend on the PC monitor resolution.
RASPBERRY PI EXAMPLE CODE
The following example code will run on the Raspberry Pi and has the virtual display lines of code commented out.
# File: animated-hello-world-pi.py
import time

from PIL import Image
from PIL import ImageDraw
from PIL import ImageFont
'''
# Virtual display
import cv2
import numpy as np
'''
# Import Luma.OLED libraries
from luma.core.interface.serial import spi
from luma.oled.device import ssd1331
# Configure the serial port
serial = spi(device=0, port=0)
device = ssd1331(serial)


def main():
    frameSize = (96, 64)
    xyCoord = [10,0]
    isUp = True
    timeCheck = time.time()
    colors = ["red", "orange", "yellow", "green", "blue"
                , "magenta", "white", "cyan"]
    color = 0
    time.sleep(0.1)
    while 1:
        image = Image.new('RGB', (frameSize), 'white')
        font = ImageFont.truetype("FreeMonoBold.ttf", 12)
        draw = ImageDraw.Draw(image)
        if isUp:
            xyCoord[1] += 1
        else:
            xyCoord[1] -= 1

        if xyCoord[1] == frameSize[1] - 13:
            isUp = False
            color += 1
        elif xyCoord[1] == 0:
            isUp = True
            color += 1

        if color == len(colors):
            color = 0

        draw.rectangle([(0,0), (95,63)], 'black', 'white')
        draw.text((xyCoord), 'Hello World', fill=colors[color], font=font)
        time.sleep(0.01)
        fps = "FPS: {0:0.3f}".format(1/(time.time() - timeCheck))
        timeCheck = time.time()
        draw.text((2, 0), fps, fill='white')

        # Output to OLED display
        device.display(image)

        '''
        # Virtual display
        npImage = np.asarray(image)
        frameBGR = cv2.cvtColor(npImage, cv2.COLOR_RGB2BGR)
        cv2.imshow('Test', frameBGR)
        k = cv2.waitKey(1) & 0xFF
        if k == 27:
            break
        '''

    # Virtual display
    #cv2.destroyAllWindows()


if __name__ == "__main__":
    main()
VIRTUAL DISPLAY ANIMATION EXAMPLE
This code runs on the PC that has been configured to run the virtual display. It includes the code for the Physical display but has been commented out.
# File: animated-hello-world.py
import time

from PIL import Image
from PIL import ImageDraw
from PIL import ImageFont

import cv2
import numpy as np
'''
# Import Luma.OLED libraries
from luma.core.interface.serial import spi
from luma.oled.device import ssd1331
# Configure the serial port
serial = spi(device=0, port=0)
device = ssd1331(serial)
'''

def main():
    frameSize = (96, 64)
    xyCoord = [10,0]
    isUp = True
    timeCheck = time.time()
    colors = ["red", "orange", "yellow", "green", "blue"
                , "magenta", "white", "cyan"]
    color = 0
    time.sleep(0.1)
    while 1:
        image = Image.new('RGB', (frameSize), 'white')
        font = ImageFont.truetype("FreeMonoBold.ttf", 12)
        draw = ImageDraw.Draw(image)
        if isUp:
            xyCoord[1] += 1
        else:
            xyCoord[1] -= 1

        if xyCoord[1] == frameSize[1] - 13:
            isUp = False
            color += 1
        elif xyCoord[1] == 0:
            isUp = True
            color += 1

        if color == len(colors):
            color = 0

        draw.rectangle([(0,0), (95,63)], 'black', 'white')
        draw.text((xyCoord), 'Hello World', fill=colors[color], font=font)
        time.sleep(0.01)
        fps = "FPS: {0:0.3f}".format(1/(time.time() - timeCheck))
        timeCheck = time.time()
        draw.text((2, 0), fps, fill='white')

        '''
        # Output to OLED display
        device.display(image)
        '''

        # Virtual display
        npImage = np.asarray(image)
        frameBGR = cv2.cvtColor(npImage, cv2.COLOR_RGB2BGR)
        cv2.imshow('Test', frameBGR)
        k = cv2.waitKey(1) & 0xFF
        if k == 27:
            break

    # Virtual display
    cv2.destroyAllWindows()


if __name__ == "__main__":
    main()
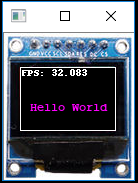
And If You Want To Get Fancy
The above image is about the right size to overlay the virtual screen on top. However, you can do this with any display module you want to simulate. Use a graphics program like Gimp to scale the image to size to fit the virtual display screen.
The Python code snippet below shows how you can overlay an image on top of another:
# Virtual display
# Open file for display background
oledDisplayFile = 'ssd1331-virtual-colour-display.jpg'
oledDisplay = cv2.imread(oledDisplayFile)
# Convert the PIL created image for OpenCV
npImage = np.asarray(image)
frameBGR = cv2.cvtColor(npImage, cv2.COLOR_RGB2BGR)
# Adjust the offsets to position
# the screen on the background image
offsetY = 34
offsetX = 16
# Combine both images
oledDisplay[offsetY:offsetY + 64, offsetX:offsetX + 96] = frameBGR
# Show resulting image
cv2.imshow('oled', oledDisplay)
The above code modifies the small section code used in the virtual display example code seen earlier. The output will be something like the image below with the new screen overlay on top:
Next Article Using the PIL Package
In the following article in this series, I will be looking at using PIL to render a menu system to output onto a display. This menu system will use a new menu library I’ll be publishing shortly on PyPi. I’ll be looking at how to implement interactive functions that I can use between the PC and the Raspberry Pi using the virtual display.
Related Articles

Nokia 5110 LCD Display Setup For Raspberry Pi Guide – Link.
Buying Featured Items
The purchase price is going to vary greatly depending on how quickly you want the items. Therefore shop around checking out Amazon, Ebay, Adafruit and local electronic stores.
DISCLAIMER: This feature may contain affiliate links, which means that if you click on one of the product links, I’ll receive a small commission. This commission helps support the website and allows me to continue to make features like this. Thank you for the support!
Banggood:
- Geekcreit® 0.95 Inch 7pin Full Color 65K Color SSD1331 SPI OLED Display – Link.
UK Searches:
UK Amazon:
- Raspberry Pi – Search.
- MicroSD Card – Search.
- Raspberry Pi Compatible Wi-Fi Dongle – Search.
- Raspberry Pi Camera – Search.
US Searches:
US Amazon:
- Raspberry Pi – Search.
- MicroSD Card – Search.
- Raspberry Pi Compatible Wi-Fi Dongle – Search.
- Raspberry Pi Camera – Search.
On Closing
I hope you find this article useful – Simulate Animated OLED/LCD Display On PC With PIL and OpenCV – Graphics and Fonts, please like and share.
One thought on “Simulate Animated OLED/LCD Display On PC With PIL and OpenCV”
Comments are closed.