
To kick-off my Pi Wars robot build, I want to start a new Raspberry Pi headless install. So this article walks through the process to install Raspbian Stretch Lite. Furthermore, I set-up the Raspberry Pi without using a display and keyboard (headless).
This series will into detail on building and programming a robot. More specifically a robot that is good enough to compete in the Pi Wars 2018 Competition. Therefore if you are looking to build your own robot (for any reason), stick around and we’ll see what we can do on a budget.
A robot chassis is going to be redundant at this point if we don’t have a robot controller to control it. With this in mind, we don’t need to rush out and look for a chassis just yet. Instead, we can concentrate on the controller just for now.
Since the theme of this robot build is Pi Wars, our primary robot controller should be run on a Raspberry Pi. Therefore to kick-off our Pi Wars robot building project, I’m going to start working with the Raspberry Pi first.
Raspberry Pi Headless Install
Overview
The Raspberry Pi headless install guide describes one method of installing the Raspbian Stretch. Consequently, the guide uses software tools that may need to be installed to complete the install process. However, you can adapt the guide to suit the software tools you already have or prefer.
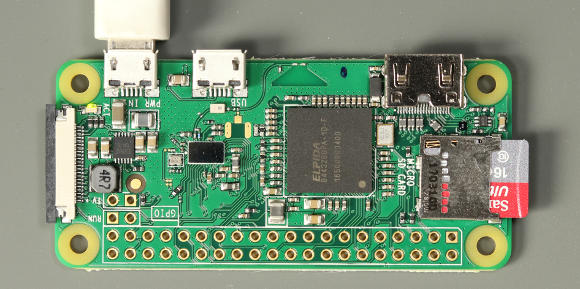
Furthermore, while this guide uses the Raspberry Pi Zero W, you can use other Raspberry Pi boards you have. However, the guide assumes that the Raspberry Pi has a compatible Wi-Fi adapter/dongle.
The setup process will be as follows:
- Download and install the Raspbian stretch image file.
- Then add files to /boot on the microSD card to enable SSH and to pre-configure Wi-Fi connection.
- And Finally, boot the Raspberry Pi for the first time and login via SSH over Wi-Fi.
Items Required For Raspberry Pi Headless Install
Hardware
- Raspberry Pi board.
- Compatible Wi-Fi adaptor if required.
- microSD Card, and also the adaptor if required to fit card reader ports of different size.
- Compatible USB power supply and cable.
- Desktop or laptop computer to download and install Raspbian Stretch image.
Software
- Etcher – for extracting and copying the Raspbian Stretch image to the microSD card.
- Notepad++ – for creating Unix compatible text file in the Raspbian boot directory.
- PuTTY – for connecting to the Raspberry Pi login screen via SSH.
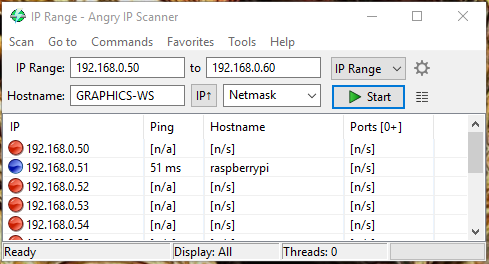
- Optional: Install a network scanner application on a mobile device or computer. A popular download for the PC is Angry IP Scanner. – used to get the IP network address of the new Raspberry Pi headless install. Basically, this is an alternative to router login to view device connection list.
Find the links to the software near the bottom of this page.
Install Raspbian Stretch Lite
So now you have the bits and pieces and also the software installed, let’s continue.
I’m using Raspbian Stretch Lite because for now I believe I don’t need the desktop for the user interface. However, this guide should also work for Raspbian Stretch with Desktop if you prefer to install that instead.
- Optional – Create folders and subfolders on the computer to hold the Pi Wars robot project files.
- Proceed to download the Raspbian Stretch Lite image file, then move the file to the project folder if desired.
- Insert the microSD card into the card reader connected to the computer.
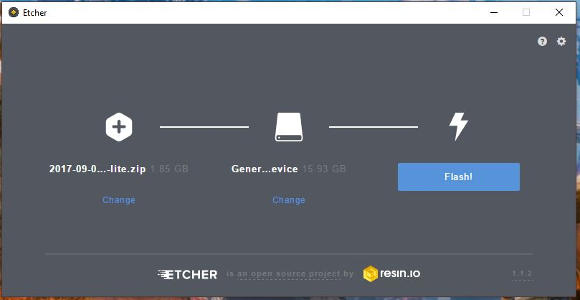
- Run Etcher and then load the Raspbian image file; no need to unzip.
- Check that the microSD card is mounted by Etcher. Then click Flash!
- When Etcher returns with Flash Complete message.
- Then remove the microSD card from the writer.
- Finally, reinsert the microSD in the card reader ready for the next step.
Enable SSH, Pre Configure Wi-Fi
The start of our Raspberry Pi headless install
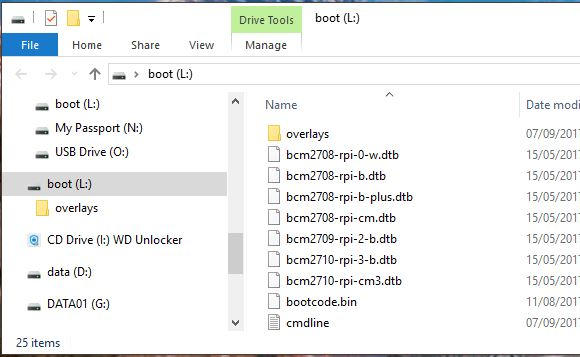
In the following steps, we’ll add a couple of files to the boot drive of the microSD card. If you open the files and folders explorer application on the computer you should be able to spot the drive/device called boot. Thus the boot drive will already contain other files.
Enable SSH
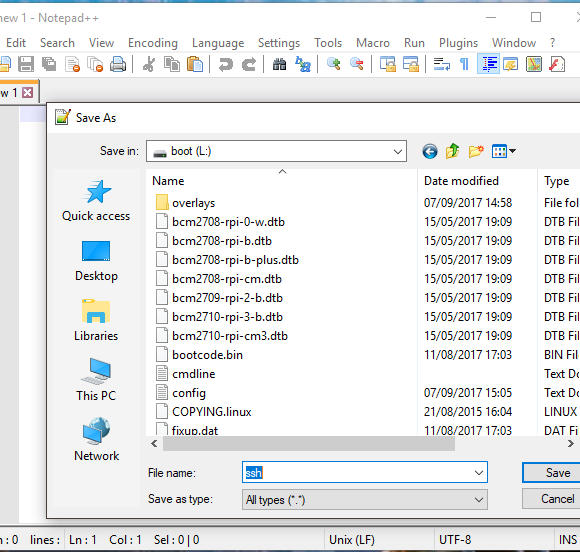
All we’re doing here is creating an empty file called SSH with no file extension. This is enough to enable SSH when the Raspberry Pi first boots up. This is the first part of the Raspberry Pi headless install.
- Run Notepad++ and open a new document.
- Open the Save As… dialogue under the File menu.
- Select device/drive boot to save to.
- Then enter the new file name called ssh.
- Change save as type to All types(*.*).
- Then click Save.
Pre Configure Wi-Fi
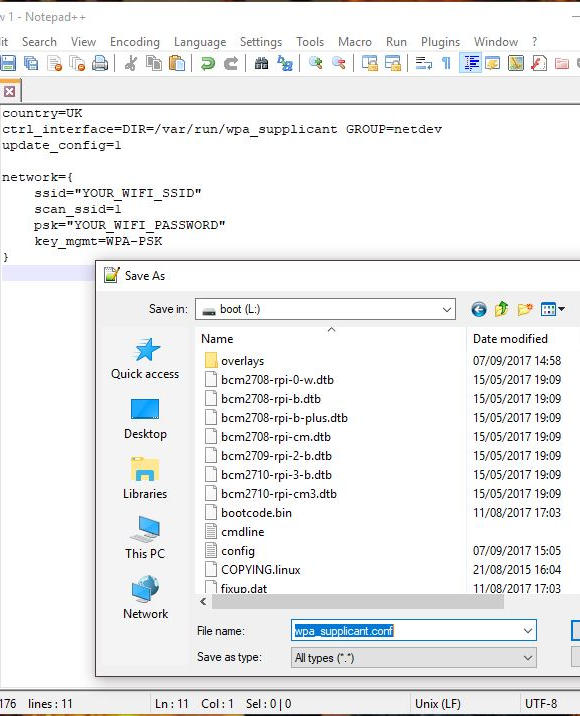
Example of the contents of wpa_supplicant.conf file:
country=UK
ctrl_interface=DIR=/var/run/wpa_supplicant GROUP=netdev
update_config=1

network={
   ssid="YOUR_WIFI_SSID"
   scan_ssid=1
   psk="YOUR_WIFI_PASSWORD"
   key_mgmt=WPA-PSK
}
So this is the final part of our Raspberry Pi headless install where we set up a Wi-Fi pre-configuration file. Therefore you will need the SSID and the password of the network you want to connect to. Next, we enter the credentials into the file similar to above. Thus we swap the dummy connection details with real Wi-Fi credentials.
Change File Line Break Setting
Also, note that you will need to change the line break characters before saving the following file. For example, change Windows(CR LF) or Macintosh(CR) to Unix(LF). Thus this can be done by right-clicking the indicator in the lower Notepad++ status bar, the bottom of the document window. See example in the image below.
Create wpa_supplicant.conf File
- Run Notepad++ and open a new document.
- Then copy the example wpa_supplicant.conf to the new document.
- Change line break setting to Unix(LF) as described above.
- Open the Save As… dialogue under the File menu.
- Select device/drive boot to save to.
- Then enter the new file name called wpa_supplicant.conf.
- Change save as type to All types(*.*).
- Then click Save.
Raspberry Pi Headless Install SSH Login
In short, we’re going to power the Raspberry Pi, find the IP address and login via SSH. The steps below walk through the process in more detail.
- Connect the Raspberry Pi to the power supply.
- Then allow up to 2 minutes for the boot process to finish.
- Optional: Use a network analyzer app on your mobile device to find the network IP address of the Pi. However, you Can also use Angry IP Scanner.
- Or if only one Pi is on the network, try raspberrypi.local in place of the IP address.
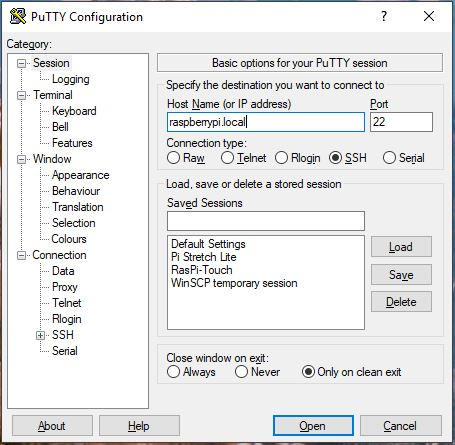
- Run PuTTY so we can create SSH session.
- Enter the hostname. Can be raspberrypi.local or the IP address you found using an IP scanner application.
- Select the SSH connection type.
- Then click the open button at the bottom.
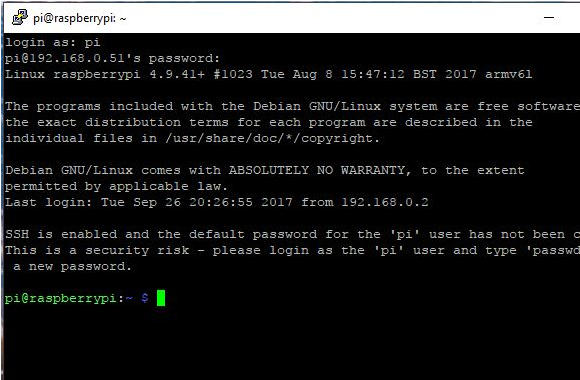
If you have entered everything correctly you will be presented with the login screen to the new Raspberry Pi headless install. Login as pi and then enter the password raspberry.
Raspberry Pi Headless Install
Congratulations, you are done for now. Next time we’ll configure the Raspberry Pi to finish the install.
Links to featured
- Pi Wars – Link.
- Pi Wars USA – Link.
- Raspbian Stretch download – Link.
- Etcher – Link.
- Notepad++ – Link.
- PuTTY – Link.
Next Article
The next instalment of the Pi Wars series I continue with the Raspberry Pi headless install.
Related Articles

Raspberry Pi Raspbian Virtual Machine on your Desktop – Link.

Pi Wars Competition 2018 – Getting Started – Link.
Buying Featured Items
The purchase price is going to vary greatly depending on how quickly you want the items. Therefore shop around checking out Amazon, Ebay and local electronic stores.
UK Searches:
UK Amazon:
US Searches:
US Amazon:
On Closing
I hope you find this article useful – Raspberry Pi Headless Install Without A Display Guide, please like and share.
3 thoughts on “Raspberry Pi Headless Install Without A Display Guide”
Comments are closed.